


This 3D printable part is provided as-is, without warranty and you are responsible for your own results. By downloading this digital file, you are accepting and agreeing to the terms and conditions of this site and you hold us free of all liability and responsibility for any actions or results or adverse situations created by this printed part.
Version: V32 | File Size: 606kb | Posted: 3/9/2015
3D Design by Mike Adams, the Health Ranger
Revision Notes | Printing Instructions
![]()
This work is licensed under a Creative Commons Attribution-NonCommercial 4.0 International License. By downloading this innovation, you agree to abide by the license: Creative Commons Attribution-NonCommercial.
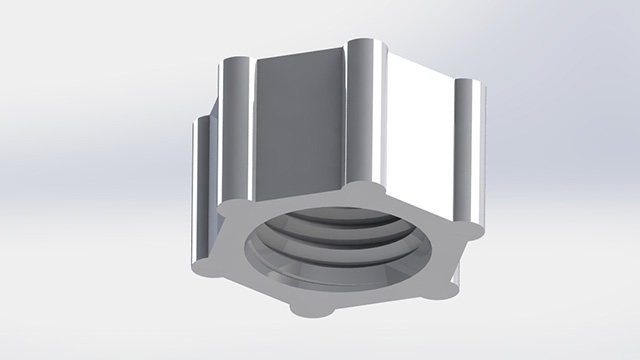
If you experience any leaks from your Grow Box, tighten this nut more in order to increase the compression of the garden hose washer against the inner wall of the Grow Box.
If you have difficulty attaching the nut to the Float Valve Receiver, try turning it over and threading it from the other side. Even if securing the nut is difficult the first time, it will "break in" after you use it once or twice.
Please Note: If nut is too loose, try this model. 3D printers vary considerably on how well they print threads.
Click here for detailed assembly instructions (with photos).
Approximate print time = 18 minutes
Filament: Taulman T-glase, any color
Print temperature: 250C
Bed temperature: 0C - 70C
Nozzle size: 0.5mm - 0.7mm (0.4mm nozzle is too small to print t-glase)
Layer height: 0.35mm (do not go below 0.3mm)
Print speed: 25 - 40 mm/s (use 50% for first layer)
Filament flow rate: 90% - 94%
Infill: 100%
DO NOT use ABS or PLA. The model will be too fragile.
!! IMPORTANT !! You MUST print in a way that allows adequate layer cooling. There are essentially four ways to accomplish this:
1) Print 3 or more parts at a time so that each part has time to cool before the next layer.
2) Set your slicer to force a layer wait time of 15 seconds or more.
3) Print using a sacrificial cylinder object far away from your primary object, forcing the print head to move a long distance, thereby providing additional cooling time for each layer.
4) Crank up your fan speed to 100% during these layers.
3D Design by Mike Adams, the Health Ranger
![]()
This work is licensed under a Creative Commons Attribution-NonCommercial 4.0 International License. By downloading this innovation, you agree to abide by the license: Creative Commons Attribution-NonCommercial.
Permissions beyond the scope of this license may be available at www.FoodRising.org/Permissions
FoodRising.org is a project of the Consumer Wellness Center and is made possible using donations from our supporters. If you would like to make a donation, please visit www.ConsumerWellness.org/Donate.html
All donations are tax deductible. Tax ID: 84-1129375
Once you click submit, we will send you an email asking you to confirm your free subscription.
Your privacy is assured and your information is kept confidential.
You may unsubscribe at anytime.


